

Overview:
The purpose of stirring a cocktail, as opposed to shaking, is to agitate the ice as little as possible so the drink has a smooth and even texture without any air bubbles. For more about when it's better to stir or shake a cocktail and why, visit the Shaking vs. Stirring Page.
The "Professional" Stir
Of course, we all know how to stir something. You just move a spoon around in a circle. This is more or less the way it works for cocktails too, though for today's bartenders stirring a drink is a bit more involved than stirring soup on the stove, and it is this method of stirring that is outlined on this page.
If you've never seen this technique, it almost looks like a magic trick. The spoon quietly glides around the glass like it's doing pirouettes in a cocktail ballet. Dance metaphors aside, what's going on is the back of the spoon is only touching the inner perimeter of the mixing glass. It never moves into the center. Why stir this way?
It has three major benefits:
-
It allows the bartender to stir faster, expediting chilling and dilution.
-
It is more fluid, which provides better control of chilling and dilution.
-
Perhaps most importantly, it makes one look, and feel, extremely cool.
For lack of a universally accepted term, I’ve dubbed this technique the "professional" stir. You may also see it referred to as a Japanese stir, because it was originally modeled after the stirring method of Japanese bartenders, like so many other modern cocktail trends.
Stirring
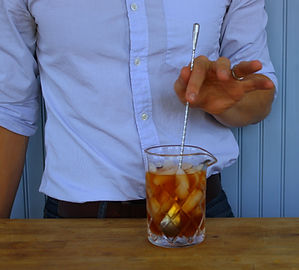
Step 1: Form Your Grip
A proper stir starts with a proper grip. This is what I find works best, but there are several ways to hold a barspoon. If something else works better for you, go for it.
This is a two-part grip. The fingers up top that hold the spoon in place, while the fingers below move it around to do the actual stirring. I’ve unimaginatively dubbed these the “holding fingers” and “stirring fingers”, respectively.
Step 3: Strain
It's common to use a julep strainer in conjunction with mixing glasses, though some Hawthornes can be used too. You can find a whole lot more about this technique on the Straining page.
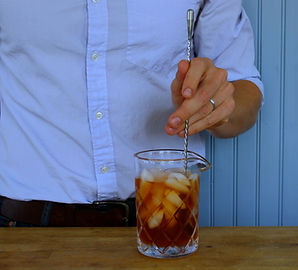
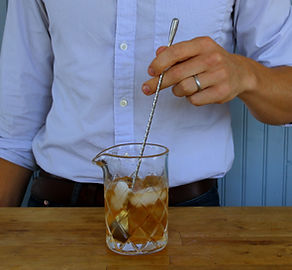
Step 2: Stir
Here’s where things get interesting. To make the spoon circumnavigate the mixing glass, the stirring fingers take turns pushing and pulling it around, sharing the balance of power. As discussed above, the goal is for the back of the spoon to stay against the inner perimeter. The best way to do this is to keep it pressed up against the glass' edge, this way the contours can help guide the spoon around.
Try to relax your hands, wrists and arms as best you can. It’s tempting to keep them stiff, but stiffness is the enemy. When stirring, ideally just your hand should be moving, and maybe your wrist somewhat. But your arms should be more or less still.
Below is a look at one stir rotation broken down from both the perspectives of the stirring fingers and holding fingers. Once you begin to stir faster, the centrifugal force against the spoon will do most of the work for you and your hand will just be the conductor. You'll barley have to think about it. But for starters, it helps to concentrate on the details.
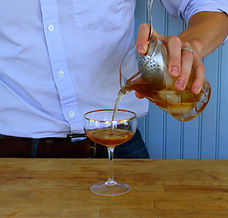
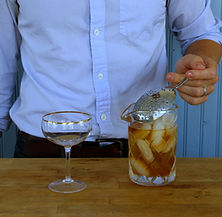
Position. Place the julep strainer over the mixing glass. Curved side down.
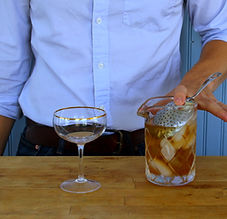
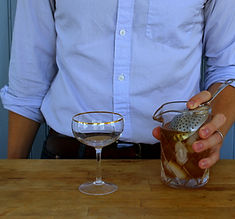
Hold. Secure it with your index finger.
Strain! Press down with your index finger. Lift, tip and pour.
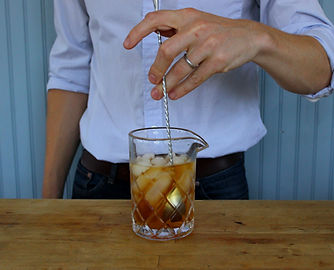
Holding Fingers: Thumb & Index - After you've combined all the ingredients and filled your mixing glass with ice (in that order!), plunge your barspoon to bottom of the mixing glass, pressing the back of the spoon against the inside of the glass. Grip it lightly towards the top with your thumb and index finger. I wrap my index finger halfway around so the spoon rests at my middle knuckle. Don't pinch, the spoon will still be spinning between these fingers.
Stirring Fingers: Middle & Ring -
Next, straddle your middle and ring fingers on opposites sides of the spoon, with the middle finger draped on top, right below your index finger and your ring finger underneath, the same side as your thumb.
Alternative Grip: Not to confuse things, but another option is to grip the spoon a like a pencil using just three fingers. Here, the thumb and index finger are positioned the same as in step 1, but just the middle finger goes underneath the spoon, so it's on the same side as your thumb. In this scenario the index finger does double duty as both a holding and stirring finger.
How Long to Stir? It Depends.
As I mentioned above, you’ll typically need to stir for 18-25 seconds, though depending on certain factors it could be closer to 30. The goal is to hit that sweet spot when the drink is perfectly chilled and diluted. This balance is more tenuous in stirred cocktails than it is in shaken ones, because they tend to be more delicate.
To me stirring a drink is like cooking a steak to the perfect medium rare. For most of a steak's cooking time the meat is underdone, then for a moment it’s absolutely perfect, but if you let it sit a moment too long you've missed the window, and it’s all over (it will come as no surprise to you that I obsessively use a meat thermometer when cooking steaks). If you don't stir a cocktail enough, the drink will have a sharp alcoholic edge and won't be sufficiently cold. But stir it too long you’ll it'll be over-diluted, thin and watery.
To really get a sense of how long to stir, you need to take all the variables that affect the rate of chilling and dilution into account. Then you can adjust accordingly.
The Key Factors
-
What's the Condition of the Ice? - This has the greatest impact. The larger the ice cubes, the slower they will melt and the longer you will have to stir, and vice versa. Any type of ice can be used, but I find larger cubes preferable. Small cubes melt quickly, making it difficult to control the speed of the dilution of your drink. Also, what is the condition of your ice. It is wet and shiny or frosty and dry? The former will melt faster, the latter slower. You can read more these factors and ice in general on the Ice page.
-
Is the Mixing Glass Chilled or Not? - In addition to chilling your glassware, I highly recommend chilling your mixing glass beforehand. This is the best way to get the drink extra cold without over-diluting it. You’ll have to stir for a few seconds longer, but it's well worth it.
-
How Fast are You Stirring? - The faster you stir, the quicker the drink with be chilled and diluted. So if you’re an experienced stirrer, you don't have to stir as long.
When in Doubt, Taste
Now that I’ve overwhelmed you with more variables than you ever imagined could go into something as simple as stirring liquid in ice, let me recommend a different approach. Rather than obsessing over the details, use a straw or spoon to taste the drink along the way. It might not be obvious to you at first, but you’ll soon develop a feel for the balance you’re looking for and how it correlates to stirring time. Eventually it'll become like a second sense. Trust your instincts.
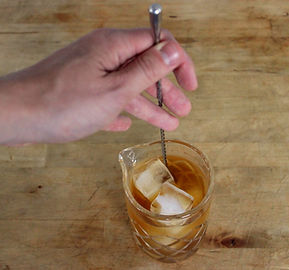
Start with the back of the spoon closer to you. At this position, your middle finger will be pulling against the handle towards you, while your thumb is pushing back to lock the spoon in place.
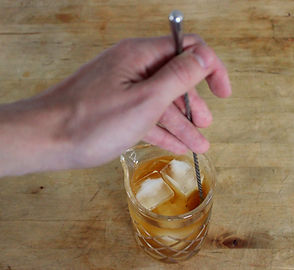
The middle finger pulls it back. Once the spoon reaches the top of the glass, the middle finger becomes the leader and will begin to pulls it back around. Still pressing it into the side. The ring finger is now finger supporting underneath.
Ring finger takes back over. Now we are back where we started, with the spoon close to you. Time to push back with the ring finger to start the whole rotation again. And around and around it goes...
Top View: Holding Fingers
While the stirring fingers are doing their thing, the holding fingers up top need to keep the end of the spoon fixed in the center, with the handle twirling between them. As you get more comfortable, you can gently roll the spoon forward with your thumb as it comes around to help move things along.
Side View: Stirring Fingers
Gently roll spoon with your thumb. As you push the spoon back around with your ring finger, you can also roll the handle a bit with your thumb to aid the movement. Eventually you can use this action to whip the spoon around faster, with less effort.
Keep the handle fixed in center. While the lower end of the spoon that moves in a circle, the handle should more or less stay at a single point in the middle of the mixing glass.
The handle is at an angle. Because of this positioning, the spoon handle will always be at an angle, which helps to put pressure against the edge of the glass.
2.
1.
Alt.
1.
2.
2.
3.
3.
2.
1.
4.
Practice, Practice, Practice
While it's not absolutely necessary to making good drinks, mastering the professional stir is one of the most gratifying cocktails skills you can acquire. But you have to be committed. Bartenders make it look easy, but it takes some drilling to get it right. Your hands a need chance to acclimate to how they’re supposed to move. As I often like to recall, one of my most vivid memories of learning to bartend was practicing stirring at 4am in my kitchen after a barbacking shift at Clover Club.
I advise practicing with just ice and water at first so you don’t risk wasting any cocktails by over-diluting them. I wouldn't practice with an empty mixing glass either. A great barspoon and mixing glass - the traditional vessel used to stir cocktails in - makes a big difference as well. Though you can stir in anything, such as a rocks glass, which in some cases may even be preferable.
Most importantly, don’t give up! This will probably feel a little unnatural at first. Have patience, don’t get frustrated, and keep practicing. Stirring is one of those riding-a-bike skills that you never lose. Once you have that “aha!” moment you’ll never think about it again.

1.
4.
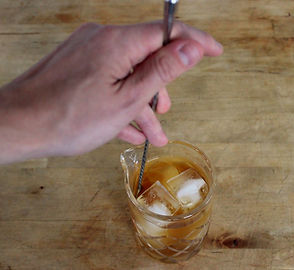
Ring finger pushes spoon forward. Now, to move the spoon, use your ring finger to push it into the side of the glass, (it'll move to the left if you’re a righty, unlike me), as the glass curves the spoon will begin to curve as well. As your ring finger pushes, relieve the pressure from your middle finger, but still keep it over the spoon to help guide.
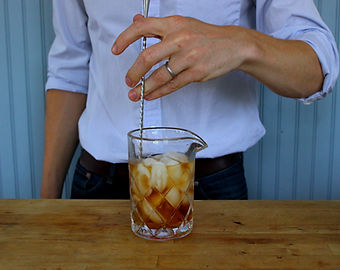
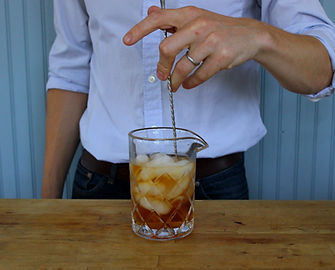
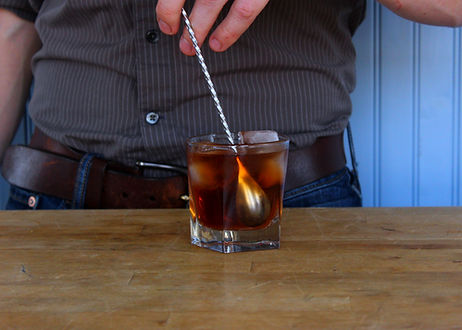
Building and Stirring in Glass
While I generally advocate for stirring cocktails in a mixing glass and then straining them into the serving glass, an exception can be made if that cocktail is going to be served on the rocks, like say, an Old Fashioned or Negroni. In those cases you can get away with the stirring the drink right in the glass you'll be drinking from. We call this method “build in glass”. The main reason to do it is primarily for convenience. All you need is a barspoon. No mixing glass or strainer necessary.
The drawback of course is the drink will be sitting on the ice has been stirred with, which means it will have already begun to melt and therefore, the cocktail will become watered down faster. But there are few measures you can take to reduce this issue:
-
Chill your glass - Put it in the freezer ahead of time, even if it’s for 15 minutes.
-
Stir with larger cubes (but not giant ones) - As I said above, bigger cubes melt slower. Stirring with ice from 1x1 Perfect Cube Trays. is ideal. Of course if the ice is too big you won't be able to turn it around in the glass.
-
Don’t stir for quite as long - It’s a good idea to stop stirring short of a cocktail’s sweet spot and let evolve as you drink it. This way you'll over over dilution on the back end. It’s ok if the drink it a little under diluted or not quite cold enough at first. It’ll get there.
Additional
Stirring Variables
I Prefer a Mixing Glass, But That's Me
I still think using a mixing glass achieves a better, and more consistent result and find this method is better suited to home bartending environments. That said, if you manage the variables well, the sacrifices will be close to negligible, which, coupled with the added speed and efficiency might make it a worthwhile option for some professional bartenders.
Use a Round Glass!
If you do go this route, make sure you’re using a glass that’s circular without any edges so you can stir fluently. If there are any corners you're going to have a tough time.

How Long to Stir?
Stirring takes longer than shaking. You'll typically need about 18-25 seconds, depending on the ice you’re using. That's a pretty big window. The more cocktails you make, the better you'll get a feel for how long you need to stir from one to the next. As always, when in doubt, taste. You can find more of my musings on stirring time below.
3.
Grip. Wrap your hand under the strainer handle and around the mixing glass.
Don't Trouble Yourself with Perfection
Like so many other cocktails techniques and tools discussed on this site, while the professional stir is important for cocktail bartenders to learn, it isn't essential to making good drinks. If you're making drinks at home, do your best to push the ice around without jostling it too much. As long as that cocktail gets chilled and diluted without being shaken, you’ve succeeded.